Configuring Google Authentication for React App (OIDC)
Authored on 3/10/2021
datahub-frontend server can be configured to authenticate users over OpenID Connect (OIDC). As such, it can be configured to delegate
authentication responsibility to identity providers like Google.
This guide will provide steps for configuring DataHub authentication using Google.
Even when OIDC is configured, the root user can still login without OIDC by going
to /login URL endpoint. It is recommended that you don't use the default
credentials by mounting a different file in the front end container. To do this
please see this guide to mount a custom user.props file for a JAAS authenticated deployment.
Steps
1. Create a project in the Google API Console
Using an account linked to your organization, navigate to the Google API Console and select New project. Within this project, we will configure the OAuth2.0 screen and credentials.
2. Create OAuth2.0 consent screen
a. Navigate to OAuth consent screen. This is where you'll configure the screen your users see when attempting to
log in to DataHub.
b. Select Internal (if you only want your company users to have access) and then click Create.
Note that in order to complete this step you should be logged into a Google account associated with your organization.
c. Fill out the details in the App Information & Domain sections. Make sure the 'Application Home Page' provided matches where DataHub is deployed at your organization.
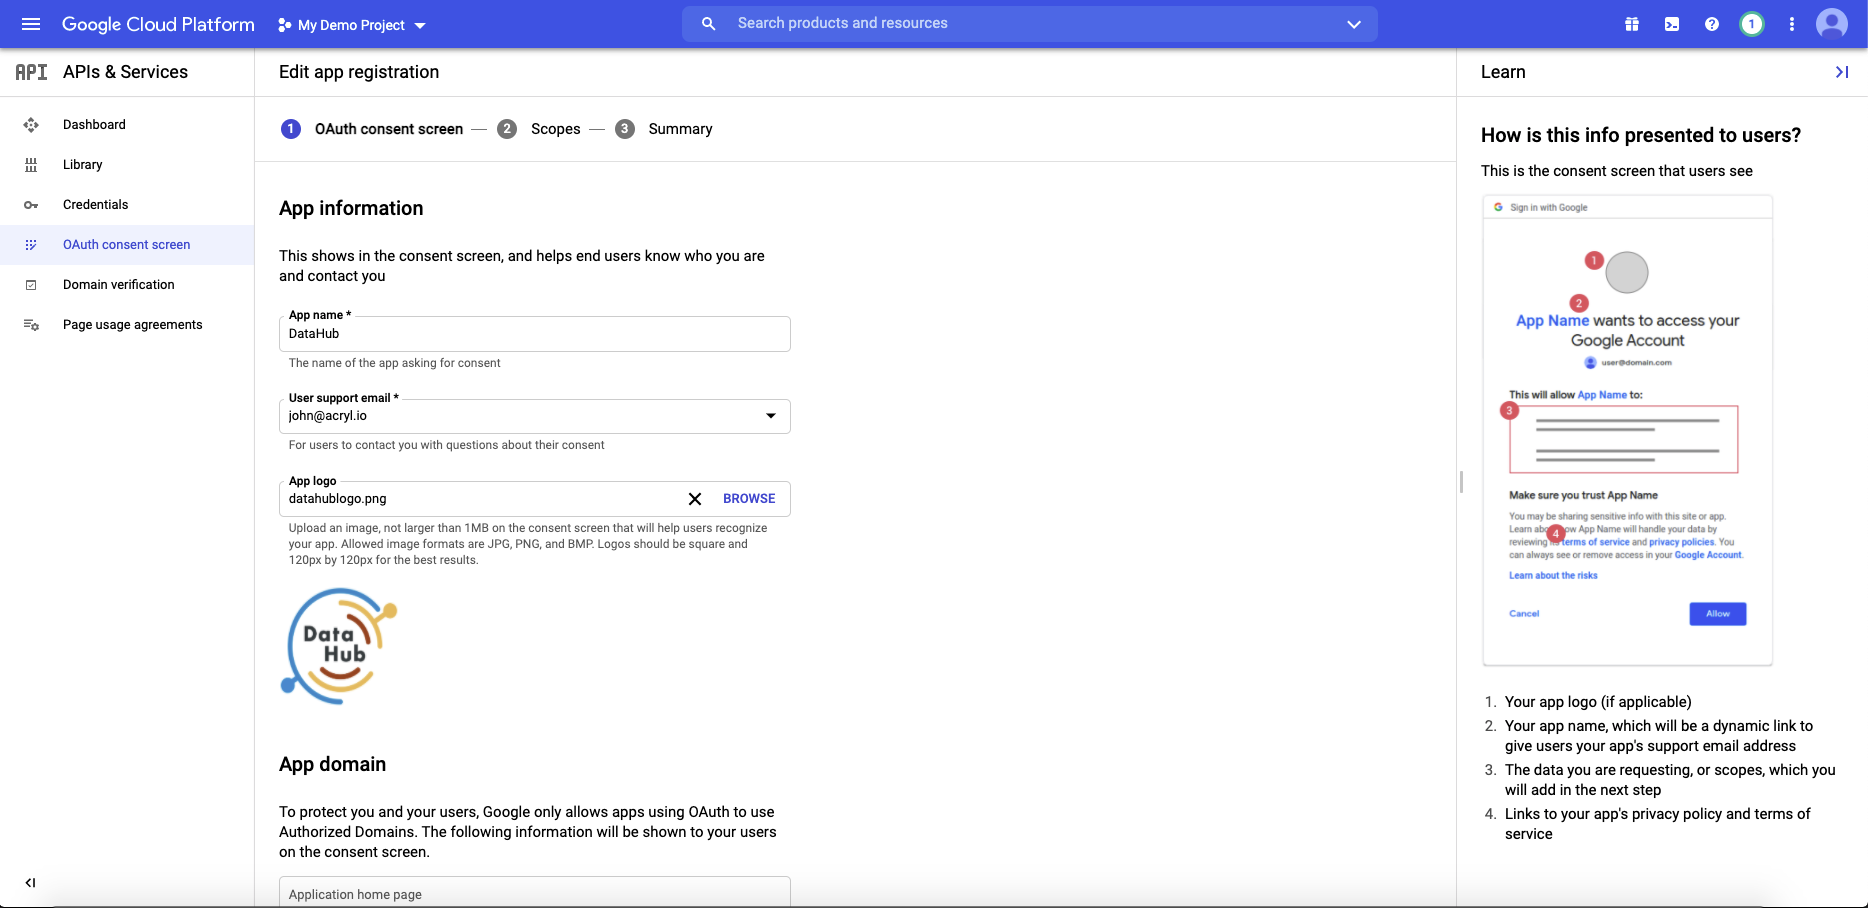
Once you've completed this, Save & Continue.
d. Configure the scopes: Next, click Add or Remove Scopes. Select the following scopes:
- `.../auth/userinfo.email`
- `.../auth/userinfo.profile`
- `openid`
Once you've selected these, Save & Continue.
3. Configure client credentials
Now navigate to the Credentials tab. This is where you'll obtain your client id & secret, as well as configure info like the redirect URI used after a user is authenticated.
a. Click Create Credentials & select OAuth client ID as the credential type.
b. On the following screen, select Web application as your Application Type.
c. Add the domain where DataHub is hosted to your 'Authorized Javascript Origins'.
https://your-datahub-domain.com
d. Add the domain where DataHub is hosted with the path /callback/oidc appended to 'Authorized Redirect URLs'.
https://your-datahub-domain.com/callback/oidc
e. Click Create
f. You will now receive a pair of values, a client id and a client secret. Bookmark these for the next step.
At this point, you should be looking at a screen like the following:
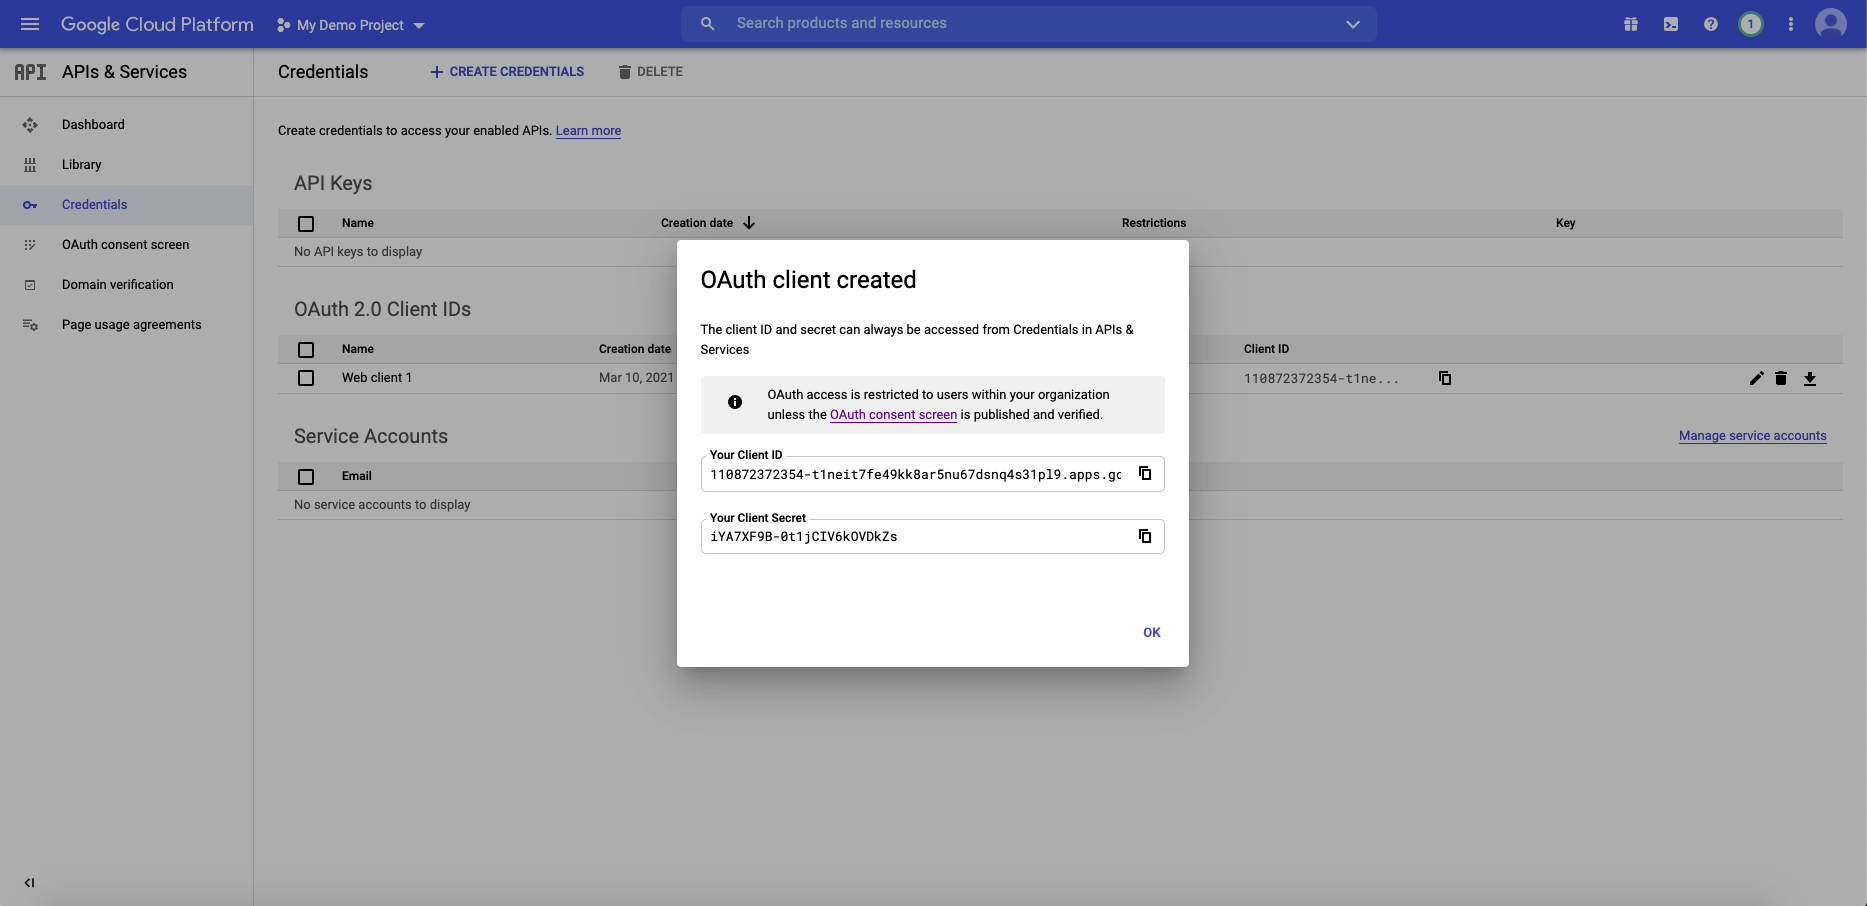
Success!
4. Configure datahub-frontend to enable OIDC authentication
a. Open the file docker/datahub-frontend/env/docker.env
b. Add the following configuration values to the file:
AUTH_OIDC_ENABLED=true
AUTH_OIDC_CLIENT_ID=your-client-id
AUTH_OIDC_CLIENT_SECRET=your-client-secret
AUTH_OIDC_DISCOVERY_URI=https://accounts.google.com/.well-known/openid-configuration
AUTH_OIDC_BASE_URL=your-datahub-url
AUTH_OIDC_SCOPE="openid profile email"
AUTH_OIDC_USER_NAME_CLAIM=email
AUTH_OIDC_USER_NAME_CLAIM_REGEX=([^@]+)
Replacing the placeholders above with the client id & client secret received from Google in Step 3f.
5. Restart datahub-frontend-react docker container
Now, simply restart the datahub-frontend-react container to enable the integration.
docker-compose -p datahub -f docker-compose.yml -f docker-compose.override.yml up datahub-frontend-react
Navigate to your DataHub domain to see SSO in action.